During this series of posts we have talked about working with Optimizely Fullstack from a development perspective and integrating with a Commerce application.
In this post we will get into the fun stuff and implement a simple experiment.
The Experiment
For one of our E-Commerce clients, there are differing theories on what Category Listing Page sorting algorithm will result in customers seeing products they are more likely to buy.
The default sorting for listing pages on this website was by Newest products. The theory is that customers who interact with this brand prefer to see the latest products.
A hypothesis is that more sales would convert if products were displayed in order of Best Seller. Best Seller is a numeric value which contains the accumulated purchases of that products variants over 2 years. It will favour older and well known products.
Category listing pages perform well so any change to a Newest algorithm as default needs to be evidence driven. A perfect first Experiment!
Optimizely Experiment Configuration
With the Optimizely Commerce integrations discussed in the previous posts in place, we can proceed to configure our first experiment as follows:
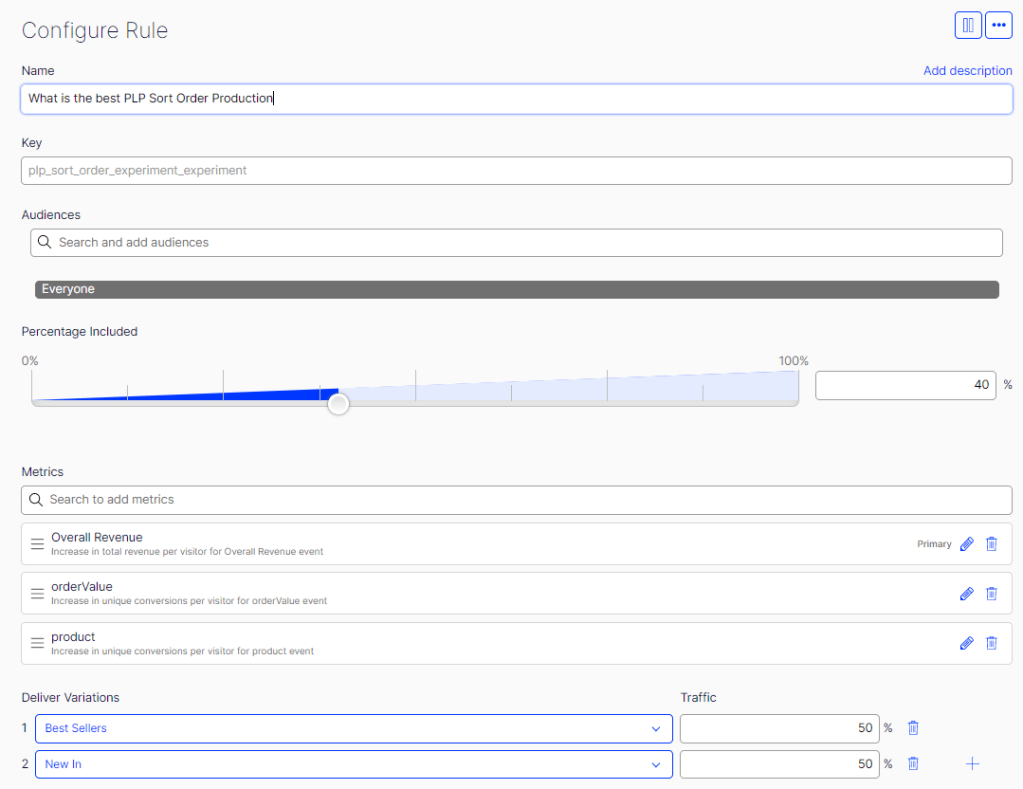
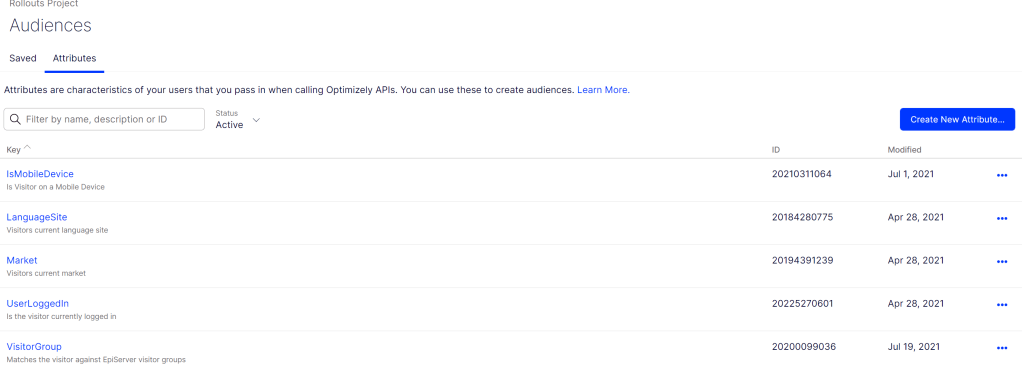
Audience

Attributes and Segmentation
You can target particular segments of your audience with an experiment through setting “Audience Attributes”. These attributes are synced to Optimizely in the User Context of each Optimizely tracking request.
A number of audience attributes were already integrated in David’s initial Experiments project which I extended and can be viewed in the User Retriever – GetUserAttributes method.
We decided to roll this experiment out across all markets and devices so set our Audience to the default “Everyone”.
Even though we are not using Audience Attributes to target a subset of our audience for the experiment, they are still very important. Optimizely Experiment Reporting allows you to filter by these attributes to see how experiment results might differ across segments of the audience. It’s very powerful and I’ll talk about this more in the fourth and final post in this series.
Audience Percentage
We decided to target 50% of Everyone as this will give us large enough sample size to accurately measure the results of the experiments. This means that 50% of all visitors will be included in the experiment. The other 50% will simply not be included so the site will function on the current defaults.
Metrics
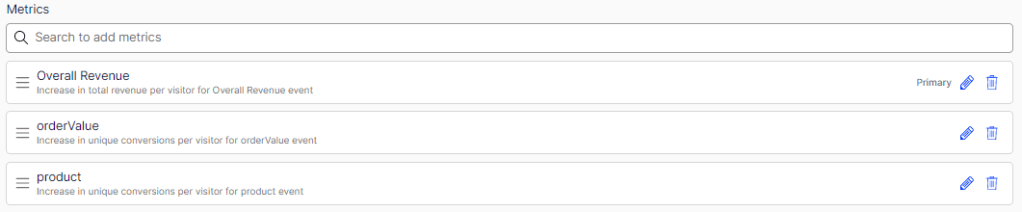
Metrics are events which are integrated in Events Tracking Service covered in the previous post.
These metrics are what allows you to define what success is for your experiment. Quite a few come out of the box with this implementation so it’s worth checking out. The metrics for our experiment are:
- Overall Revenue – The most important metric. This tells us what variation of the experiment is generating the most revenue.
- Over Value – An interesting metric which will tell us if there is a difference is average order value across variations.
- Product – In which variation of the experiment is a customer more likely to click through to view a product details page.
Variations

Here we define what variations of the experiment we want customers included in the Experiment audience to get. In our example we are running:
Best Sellers – 50%
Newest – 50%
You could easily add more supported sort orders to the experiment.
Experiment Code
In the following commit I added an Experimentation Service class that can be used to easily call Optimizely to decide on Experiment Results. The Decide method integrates with the User Context so you don’t need to repeat this code from your Web Application layer.
In this snippet from the Category Listing Page controller, if no sortBy parameter is included as a query string parameter, Optimizely will decide if the customer session should be included in the Experiment.
If Optimizely decides to Enable the experiment, you can then extract the variation from the OptimizelyExperiment object.
With our Experimentation code layer in place, adding the experiment was as easy as these few lines of code.
public async Task<ActionResult> Index(ProductCategoryListingPage currentPage, string sortBy = null)
        {

            if (sortBy == null)
            {
                // integrate with optimizely experiment
                var decision = _experimentationService.Decide(HttpContext, "plp_sort_order_experiment_experiment");
                if (decision.Enabled)
                {
                    // retrieve Experiment Variation
                    sortBy = decision.Variables.GetValue<string>("default_sort_order");
                }
            }

            // proceed to get results from Find
Next and Final Post
We now have set up and configured our first experiment.
In the next and final post we will talk about Optimizely Reports, the insights gained from this particular experiment and what it means for the roadmap for this Commerce application going forward.
There are some interesting findings. Stay tuned! 🙂