Experimenting with your Keyword Search Algorithm – 2 of 2

In post 1 in the series we set up a CMS manageable Search Algorithm Settings Page and plugged that into our Search & Navigation query.

We’ll now build on that to create an Experiment that will help us determine the optimal algorithm configuration.

Extend the Search Algorithm Settings Page

Firstly we will extend our Algorithm Settings Page with the following properties

        [CultureSpecific]
        [Display(Name = "Is Default", Description = "Indicates that this content represents the default Search Algorithm configuration", GroupName = TabNames.Experimentation, Order = 200)]
        public virtual bool IsDefault { get; set; }

        [CultureSpecific]
        [Display(Name = "Experiment Key", Description = "Matches the variation key of the Optimizely Experiment", GroupName = TabNames.Experimentation, Order = 210)]
        public virtual string ExperimentKey { get; set; }

When we set up our experiment these culture specific properties will allow us to set a default configuration and experiment with algorithms across language sites.

Setting up the Experiment

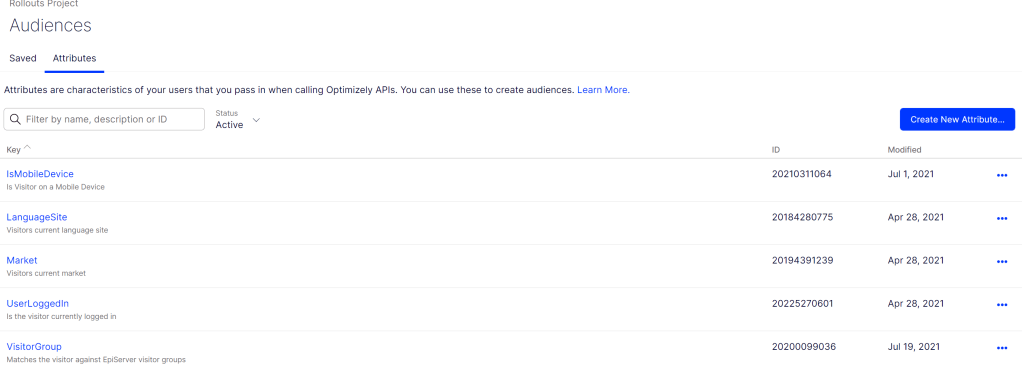
In my previous Optimizely Experiments series, I talked about setting up and running an Experiment which covers the basics of the Optimizely Full Stack product. Rather than revisit I’m going to assume the foundations and concepts explained in this series are understood.

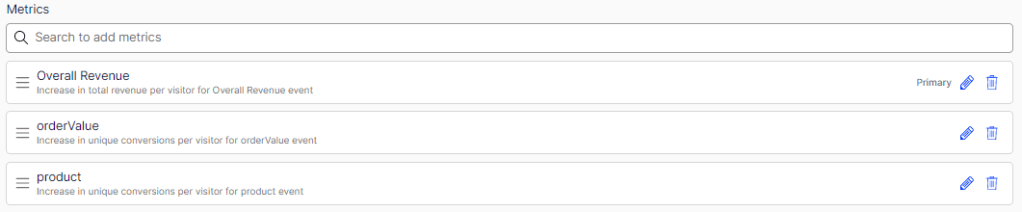
Experiment Event Metrics

Log into your Optimizely Full Stack account to begin configuration.

Define a new metric for this Experiment Called “Keyword Search Click Thru”. This event will be registered when a customer clicks a search result from a keyword search. Higher numbers of these events will indicate that the algorithm is returning relevant results to our customers.

If you are using Optimizely Search and Navigation typed search, you will most likely have Click Tracking implemented in your solution. Read more on that here:

Assuming you are using Optimizely Search and Navigation you could push the event to the Experiments API at the same point that you register the search click tracking.
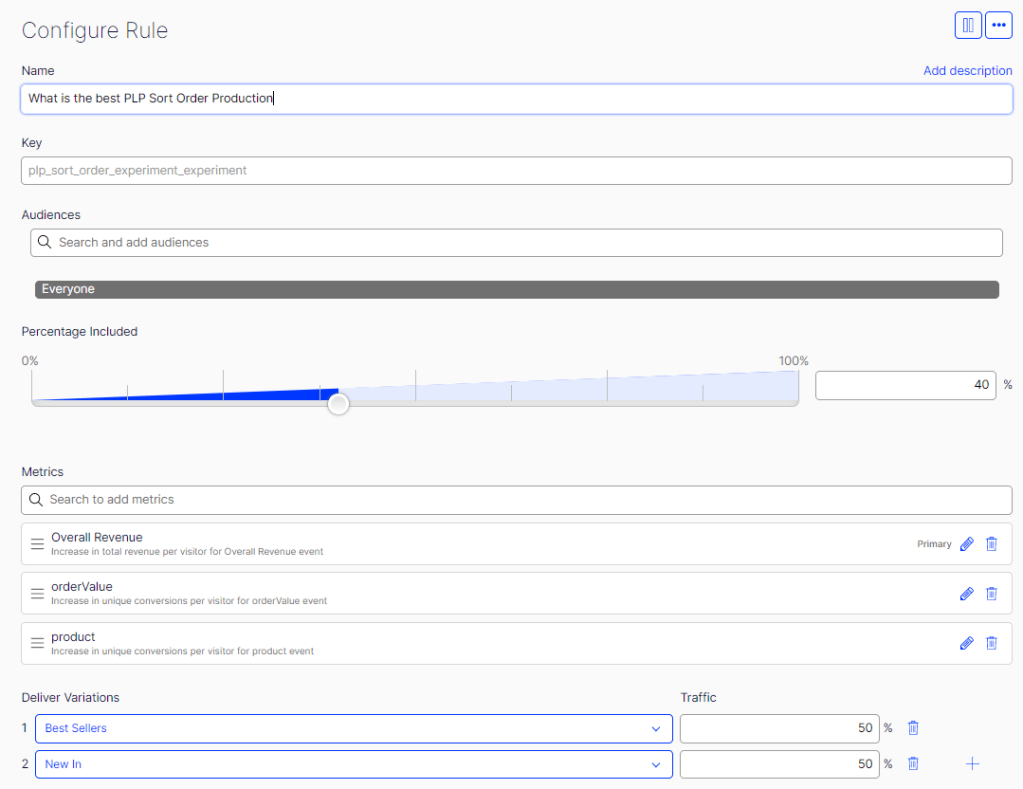
Experiment Set Up

Lets now publish variations of our Search Algorithm Settings page in the CMS, setting the Experiment Key to unique values for each instance of the page.

Then log into Optimizely Full Stack and configure your Experiment Variations noting that we will use the “experiment_key” variable to map to the settings page instance.

Finally we can configure our experiment to push to AB test instances of our Algorithm Settings page

Executing the Experiment

To retrieve the Experiment Key in code using the Experiment Service detailed in my previous blog series you simply need a few lines of code

                var decision = _experimentationService.Decide(HttpContext, "keyword_search_algorithm_experiment");
                if (decision != null && decision.Enabled)
                {
                    return _experimentationService.GetFeatureVariableString(HttpContext, decision.FlagKey, "experiment_key");
                }

Now that you have the key, you can use this to load the appropriate Algorithm Settings page and AB test the effectiveness of your search configuration.

Conclusion

Search Algorithms are tricky and the optimal configuration for each Commerce application depends on too many moving parts to predict such as catalog size, data, user intent, market specific preferences etc.

Using Experimentation to measures your algorithm success, tweak, learn and measure again is the best possible way to move towards the sweet spot and grow your conversions.

My Experience with Optimizely Fullstack (via Rollouts) – 3 of 4

During this series of posts we have talked about working with Optimizely Fullstack from a development perspective and integrating with a Commerce application.

In this post we will get into the fun stuff and implement a simple experiment.

The Experiment

For one of our E-Commerce clients, there are differing theories on what Category Listing Page sorting algorithm will result in customers seeing products they are more likely to buy.

The default sorting for listing pages on this website was by Newest products. The theory is that customers who interact with this brand prefer to see the latest products.

A hypothesis is that more sales would convert if products were displayed in order of Best Seller. Best Seller is a numeric value which contains the accumulated purchases of that products variants over 2 years. It will favour older and well known products.

Category listing pages perform well so any change to a Newest algorithm as default needs to be evidence driven. A perfect first Experiment!

Optimizely Experiment Configuration

With the Optimizely Commerce integrations discussed in the previous posts in place, we can proceed to configure our first experiment as follows:

Audience

Attributes and Segmentation

You can target particular segments of your audience with an experiment through setting “Audience Attributes”. These attributes are synced to Optimizely in the User Context of each Optimizely tracking request.

A number of audience attributes were already integrated in David’s initial Experiments project which I extended and can be viewed in the User Retriever – GetUserAttributes method.

We decided to roll this experiment out across all markets and devices so set our Audience to the default “Everyone”.

Even though we are not using Audience Attributes to target a subset of our audience for the experiment, they are still very important. Optimizely Experiment Reporting allows you to filter by these attributes to see how experiment results might differ across segments of the audience. It’s very powerful and I’ll talk about this more in the fourth and final post in this series.

Audience Percentage

We decided to target 50% of Everyone as this will give us large enough sample size to accurately measure the results of the experiments. This means that 50% of all visitors will be included in the experiment. The other 50% will simply not be included so the site will function on the current defaults.

Metrics

Metrics are events which are integrated in Events Tracking Service covered in the previous post.

These metrics are what allows you to define what success is for your experiment. Quite a few come out of the box with this implementation so it’s worth checking out. The metrics for our experiment are:

  • Overall Revenue – The most important metric. This tells us what variation of the experiment is generating the most revenue.
  • Over Value – An interesting metric which will tell us if there is a difference is average order value across variations.
  • Product – In which variation of the experiment is a customer more likely to click through to view a product details page.

Variations

Here we define what variations of the experiment we want customers included in the Experiment audience to get. In our example we are running:

Best Sellers – 50%

Newest – 50%

You could easily add more supported sort orders to the experiment.

Experiment Code

In the following commit I added an Experimentation Service class that can be used to easily call Optimizely to decide on Experiment Results. The Decide method integrates with the User Context so you don’t need to repeat this code from your Web Application layer.

https://github.com/johnnymullaney/Optimizely-Experiments/commit/39de71f0135984e9ce1b79100c04cf0cc40a4ddf

In this snippet from the Category Listing Page controller, if no sortBy parameter is included as a query string parameter, Optimizely will decide if the customer session should be included in the Experiment.

If Optimizely decides to Enable the experiment, you can then extract the variation from the OptimizelyExperiment object.

With our Experimentation code layer in place, adding the experiment was as easy as these few lines of code.

public async Task<ActionResult> Index(ProductCategoryListingPage currentPage, string sortBy = null)
        {

            if (sortBy == null)
            {
                // integrate with optimizely experiment
                var decision = _experimentationService.Decide(HttpContext, "plp_sort_order_experiment_experiment");
                if (decision.Enabled)
                {
                    // retrieve Experiment Variation
                    sortBy = decision.Variables.GetValue<string>("default_sort_order");
                }
            }

            // proceed to get results from Find

Next and Final Post

We now have set up and configured our first experiment.

In the next and final post we will talk about Optimizely Reports, the insights gained from this particular experiment and what it means for the roadmap for this Commerce application going forward.

There are some interesting findings. Stay tuned! 🙂

Introduction to extending EPiServer Visitor Intelligence for Omnichannel Marketing

With EPiServer Visitor Intelligence you can create micro targeted onmichannel segments of customers based on their interactions with your brand in store and online. EPiServer’s product suite then gives you the tools to target these segments with super personalised web experiences (CMS), recommendations (EPi Recommendations) and automated marketing campaigns (Campaign).

Collecting your Big Data

The EPiServer Profile Store is the big data repository we should be using to collect anything that may be useful for tracking our customers interactions with our brand. Behind the scenes it is an Azure Data Explorer cluster hosted in Azure. This detail will become important later in the series of blog posts when we write our queries against the data we collect using our channels.

Early in your implementation you should plan for the data you need to send to the profile store as customers interact with your site. It’s best to send anything you think you could potentially use, even at a future date, to get insights on the interaction of customers with your brand.

The two core concepts to understand when implementing tracking are:

• Customer Profiles
• Tracking Events

Customer Profiles

A customer profile is simply data we collect about a specific customer.

Events that you track about a customer are later consolidated back into their profile behind the scenes.

Out of the box the profile data is very basic with the customers email address. However you can easily extend this by sending extra profile data via the Profile Store API.

You should consider integrating the following pages with the profile API: Registration, profile pages, address management etc

Tracking Event

A tracking event can be any data which describes a specific action a customer takes when interacting with your brand. It can be anything from a page view, to creating an order or using a loyalty card in store. Any data you gather on any system which relates to a customer interacting with your brand can be tracked as an event in the profile store.

EPiServer Tracking API

EPiServer provides us with the Tracking API to enable us to very efficiently integrate profile store Tracking Events with out our EPi websites. It is a nuget package you install from the EPiServer feed.

The Tracking API enables us to quickly build payloads with the Tracking Data Factory and then send to the profile store.

Tracking Data Factory

The TrackingDataFactory is a class you can use to easily build event based Tracking payloads as customer interact with your website in such scenarios as:

  • Homepage View
  • Product Page View
  • Category Page View
  • Add to Cart or Wishlist
  • Search

Adding this tracking is very easy but sometimes we will want to customise the tracking payloads with our extended data. There are a couple of options for this using the Tracking API.

  1. Extending the payload per event
    You can extend the payload using the tracking data “setCustomAttribute” extension. This is well explained under the “Customizing Tracking Data” section of the Tracking and Recommendations EPi World developer guide.

    On an E-Commerce implementation, you will find yourself extending tracking especially for products. For example if you are selling books, how useful would it be to extend the tracking data to include the author so the website can serve recommendations to customers based on the authors they are viewing or segment customers we perceive to be interested in certain authors so we can notify them of the next big launch.

  2. Extending all payloads with specific data points
    When there are properties we want to track for all events, use the Tracking Data Interceptor. The Tracking Data Interceptorguide on EPi World explains it with a nice example for adding the current market and currency to tracking events.

Custom Events

If the Tracking Data Factory doesn’t support the event you want to track, you can build your own object and use the Tracking API library to send the event. This is a good example on Epi World of using the Tracking API to send a form submission to profile store.

Next Post

Now that we’ve covered the first step of implementing Tracking into your EPiServer site, in the next post we’ll look at techniques to extend to other systems to enable Omnichannel tracking with profile store.

This will set the platform for us to finally use EPiServer Visitor Intelligence to create and target segments of customers who are interacting with your brand both in store and online.

Building Mobile Apps at speed with EPiServer Commerce & Flagship

In this post I’ll give an overview of the key technologies and building blocks involved in delivering a full featured E-Commerce mobile app across Android and iOS that is fully integrated with your existing EPiServer Commerce website.

Native Apps

Research has shown that conversion rates are 3 times higher for customers on Native mobile apps compared to responsive web sites. Native apps can provide a speedier, cleaner user experience while taking advantage of mobile features such as push notifications to drive engagement.

The issue has been that Native App development is often prohibitively expensive. Done in it’s purest form, it requires separate iOS and Android developers working in totally different technology stacks to deliver apps that are fundamentally the same. Maintenance costs are then effectively doubled as you roll features out across both platforms.

React Native

React Native is one of a number of cross platform mobile development frameworks and frankly, without getting into comparing with other options, it’s the one i have been by far the most impressed with.

Most EPiServer or web developers will know of ReactJS as a framework for building applications using JavaScript. React Native however is an entire platform facilitating us to build native, cross platform mobile apps in which we use React for constructing the UI layers. ReactJS syntax and patterns are at the heart of React Native so there is a minimal learning curve for those already familiar with the framework.

While React uses the Virtual DOM to render code in the browser, React Native uses Native API’s to render components on mobile. These Native Components and Native Modules which come with React Native are optimised for performance.

For these components to work, React Native has to plug different technologies together – JavaScript and the Native ecosystem it is targeting. This communication happens using a “bridge” which is central to the React Native architecture. This provides the mechanism for two way asynchronous communication between the JavaScript that we write and the Native platform through JSON serialised messages. At a very basic level React Native could be described as a JavaScript to Xcode or Java translator.

ReactArchitecture.png

ReactNative and EPiServer Commerce with Flagship

Flagship is an opensource accelerator kit developed by Branding Brand for mobile applications built on ReactNative. The open source code lives in Branding Brands Github repository at: https://github.com/brandingbrand/flagship

This code base provides a whitelabel pre-built starter site and set of reusable commerce components which you can use to kick start your React Native application development.

Flagship’s JavaScript is implemented using TypeScript which introduces standards to JavaScript that, once you get your head around the syntax, EPiServer developers will be more familiar with including strongly typed variables and object oriented design principles.

Being a React Native application, styling is handled within the components via close to standard CSS style sheets.

Flagship already comes with connectors for Commerce platforms such as Shopify & Demandware with the EPiServer connector coming soon through integration with EPiServer’s Service API and Content Delivery API. However there is already the opportunity to integrate with standard Flagship components by normalising your existing responses to a Flagship JSON standard.