This post was originally written as a work around to the EPiServer’s Campaign Connector’s limitation of being tied to one client. However as @David kindly points out in his comment below this has been rectified in version 5.0.0 of the Episerver Connect for Marketing Automation package.
However the information below may still be helpful for non EPiServer implementations of Campaign
EPiServer released a Campaign Connector package (https://world.episerver.com/add-ons/connect-for-marketing-automation/connect-for-campaign/) which abstracts away authentication from Campaign’s API’s while providing an EPiServer Forms connector as well as support for a range of marketing and transactional email functionality.
Once installed Authentication is managed by simply inputting your Campaign client credentials in the Connect for Marketing Automation tool.

Campaign Transactional Connector
It was important to retain the marketing features of EPiServer’s Campaign Connector so we’ll continue to use that connector for the marketing client and then create a custom transactional email Campaign Connector which is solely used for sending transactional emails on the site.
Campaign has two API’s, a SOAP API and a HTTP API. The SOAP API is more powerful containing all the marketing endpoints but the HTTP API contains the endpoint we need for transactional emails.
The connector we will proceed to create will manage authentication using the HTTP endpoints.
Setting up our Infrastructure
To make sure we were building our solution in a maintainable way I wanted to define the Constants we will need later in the post in a dedicated class.

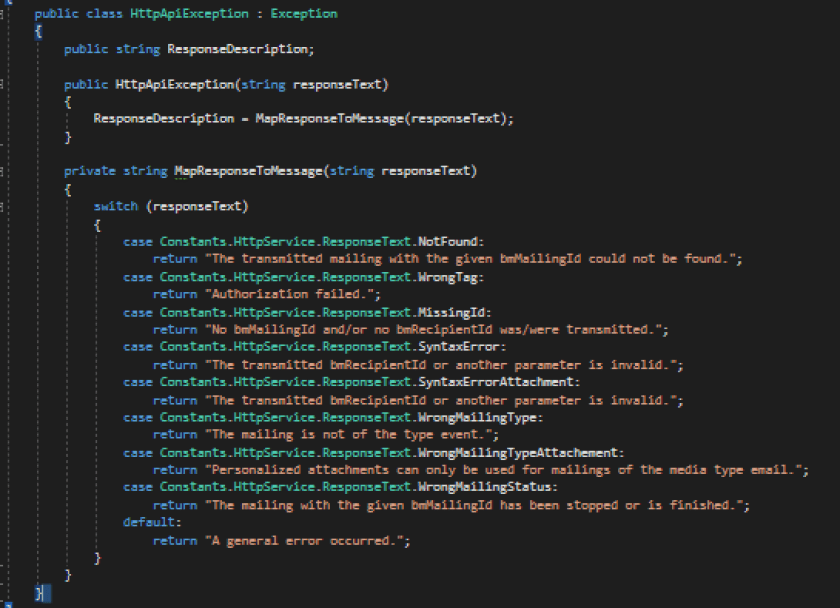
As solid error handling is important to me, I created the following class to map the text received in the response to a description taken from the API documentation.
Gateway
The HTTP Gateway layer manages authentication and requests sent to the HTTP API endpoint. It is a re-usbale class that can connect to other endpoints exposed by Campaign via HTTP.

Notice that the authorization code for security is included in the request Url. That’s why requests to the HTTP API need to always managed on the server side. This point is very important for obvious security reasons!
If the Response Text is not equal to “enqueued” we are throwing our custom exception. Also note there is no catching of potential exceptions at this layer of the application as I want errors to be handled further up the chain.
Transactional Email Sender
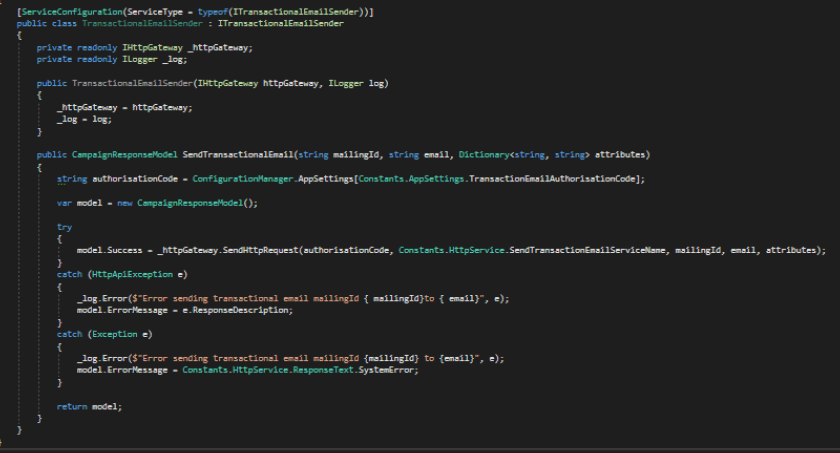
The transactional email sender class lives a layer up from the HTTP Gateway class. It will be responsible for consuming the HTTP Gateway and using it to perform transactional email sends.
The first step was to create a class which campaign API responses can be mapped to giving the next outer service layer an easy to interpret interface.

The implementation of the transactional email sender simply gets the properties which are necessary to send transactional emails and uses the HTTP gateway to manage the send.
Exceptions are caught, logged and handles at this layer.
Configuration
To configure the connector you simply need to retrieve your Client Id, Authorisation Code and Master Recipient List Id from your Campaign Client and populate your app Settings.

